AI Node
WhatsApp Chatbot runs on the WhatsApp platform. Once the chatbot window presents itself, the user can enter their reply in plain English. The bots will respond to the reply when it receives as normal WhatsApp messages and respond to them.
For example, for selecting the preferred language 1 for English and 2 for Arabic, client can send either 1 or 2. Suppose if a client enters the message as a plain text (English or Arabic), the corresponding flow should be continued. This can be achieved by using AI node.
Sample flow for selecting the gender
- Create a flow in the journey
- Add a new variable for selecting the gender
- In message node, enter the message as select your gender 1. Male 2. Female. Select the response type as “User” and map the variable you have created.
- Then, drag and drop the decision node to add the conditions.
- Add the message for each condition
- Now, connect the default branch to AI node.
To add the properties in AI Node for IBM Watson, follow the below steps,
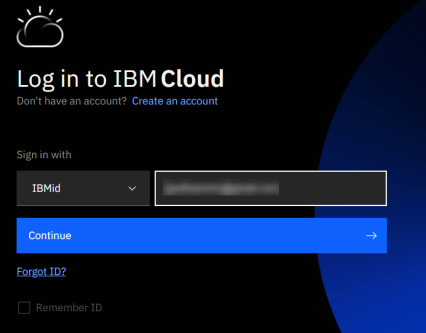
Step 1: Login to IBM Watson
Go to https://cloud.ibm.com/login and sign in with your mail id and password and click Login to direct into dashboard page.
Info! Watson Assistant has classifier models that are designed specifically to support conversational skills in the following languages: Arabic, Chinese (Simplified), Dutch, English, French, German, Italian, Japanese, Korean, Portuguese, Russian, Spanish, Swedish.
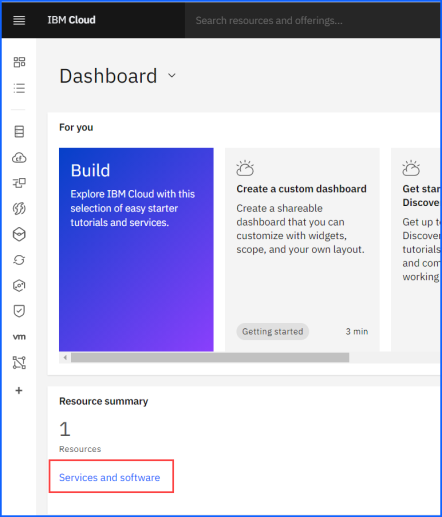
Step 2: Open Watson Assistant
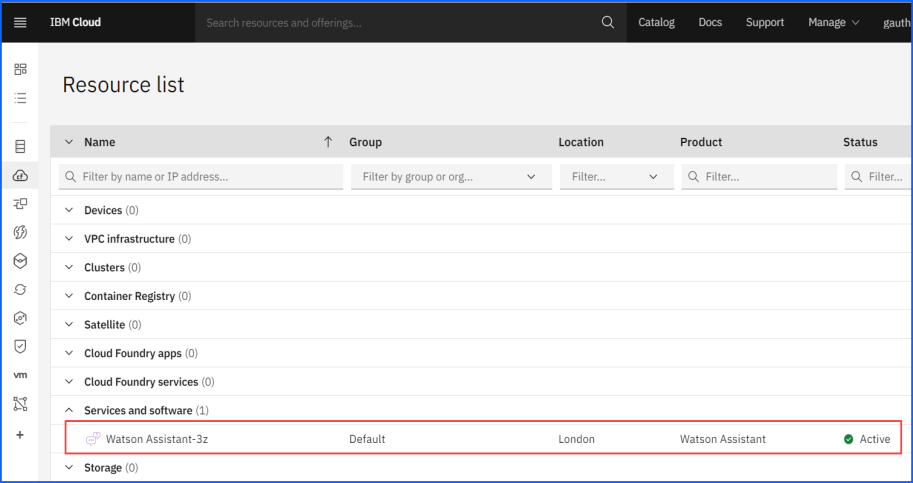
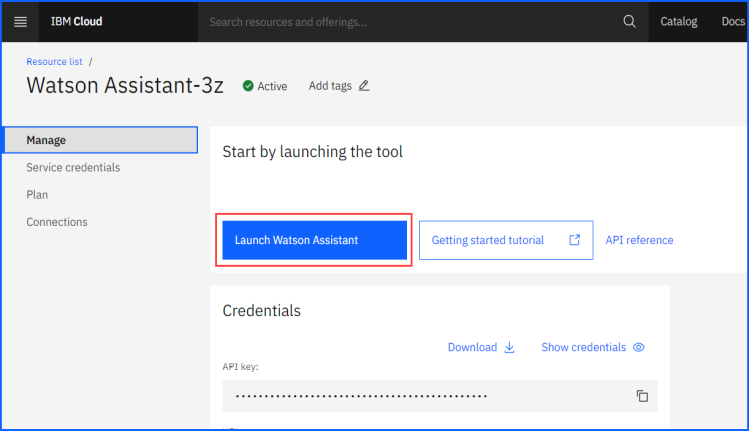
- Click Services and software under Resource summary.
- Click Watson Assistant -3z in Services and software.
- Now, click Launch Watson Assistant to open the Watson Assistant workspace.
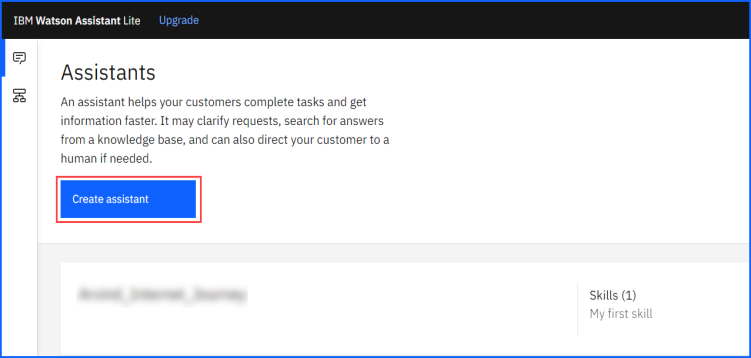
Step 3: Create an Assistant
You must use assistants to maintain separate intents, user examples, entities, and dialog flows for each application.
- Click Create Assistant
- Add details about the new assistant:
Name: A name no more than 100 characters in length. A name is required.
Description: An optional description no more than 200 characters in length.
- Click Create assistant.
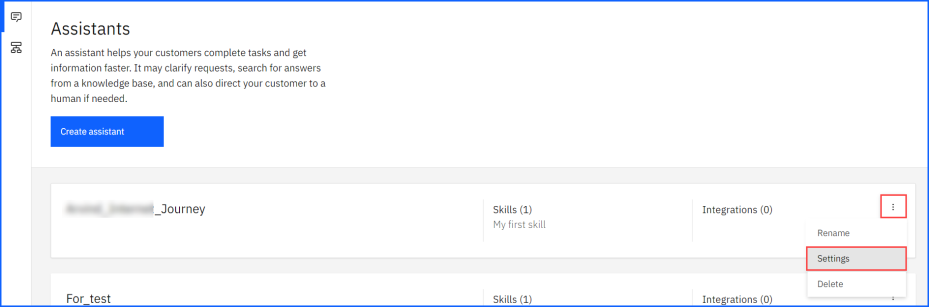
Step 3: Adding Watson URL and API key
- After creating an assistant, click
 icon and settings.
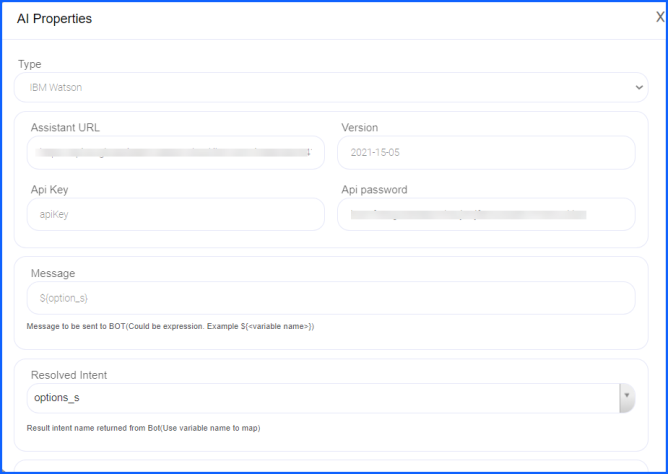
- Copy the Assistant URL and API key and paste it in AI Node Properties (Assistant URL and API password).
- Enter the Version, API key, message and Click OK.

Step 4: Add an actions or dialog skill
From the assistant where you want to add the skill, click Add an actions or dialog skill.
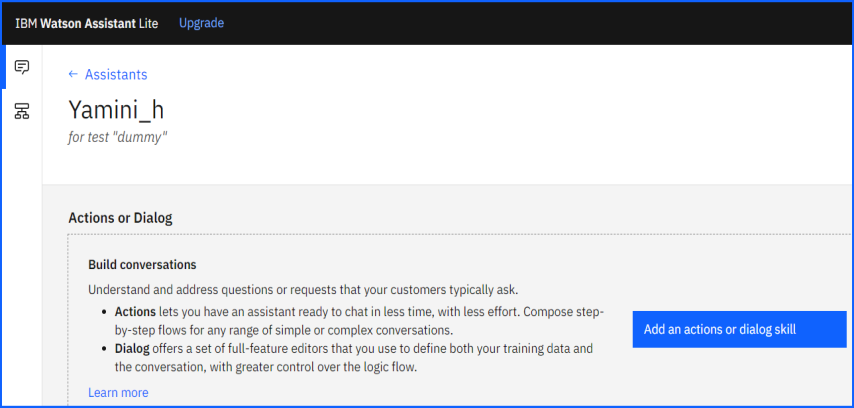
In Create Skill tab, you can choose to add an existing skill or create a new one to feed the skill into the assistant.
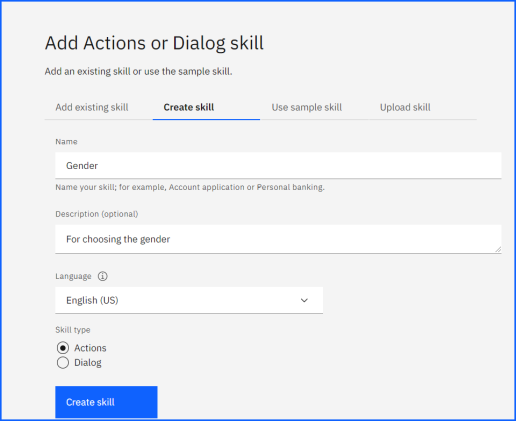
- To create a new dialog skill, remain on the Create skill tab.
- Specify the details for the skill:
Name: A name no more than 64 characters in length. A name is required.
Description: An optional description no more than 128 characters in length.
Language: The language of the user input the skill will be trained to understand. The default value is English.
- For Skill type, choose Dialog.
- Click Create skill.
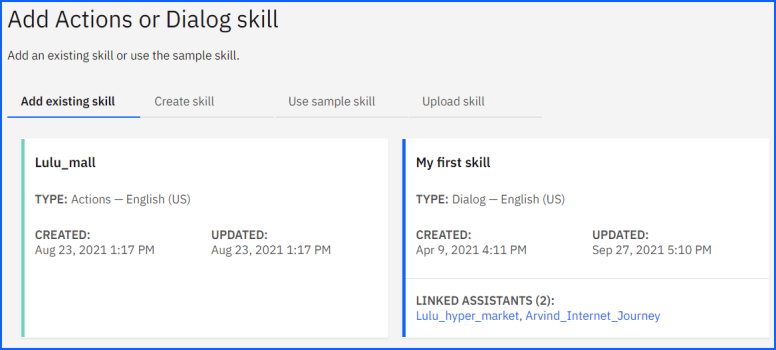
Adding the existing skill
- From the Assistants page, click to open the tile for the assistant to which you want to add the skill.
- Click Add an actions or dialog skill.
- Click Add existing skill.
Step 5: Create Intents
Intents are purposes or goals that are expressed in a customer's input, such as answering a question. By recognizing the intent expressed in a customer's input, the Watson Assistant service can choose the correct dialog flow for responding to it.
- Open your dialog skill. The skill opens to the Intents page.
- Select Create intent.
- In the Intent name field, type a name for the intent.
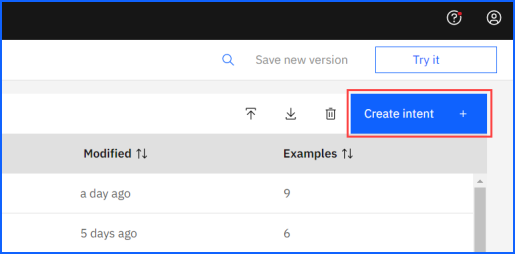
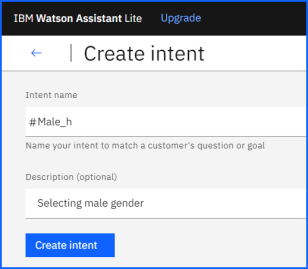
- Optionally add a description of the intent in the Description field.
- Select Create intent to save your intent name.
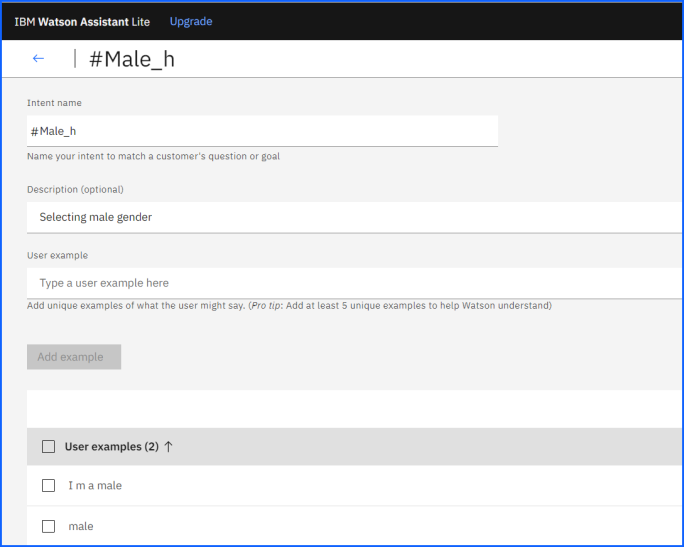
- Click Add example to save the user example.
- For each intent, add examples to train the conversation for intent recognition.
Create the Male intent and add examples for it. You can enter the same examples as shown in the below image. Similarly, add the intent and examples for female also.
When you are done adding examples, click Close arrow to finish creating the intent.
Step 6: Test the Intents
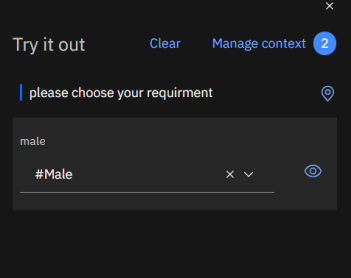
- As soon as you create an intent, you can test it by clicking Try it button in the top, right-hand side of the page.
- Enter a question or other text string and press Enter to see which intent is recognized. If the wrong intent is recognized, you can improve your model by adding this text as an example to the correct intent.
- You should get the #Male intent identified by Watson
Step 7: Build the dialog
After you specify your intents, you can construct the dialog flow. A dialog is made up of nodes that define steps in the conversation.
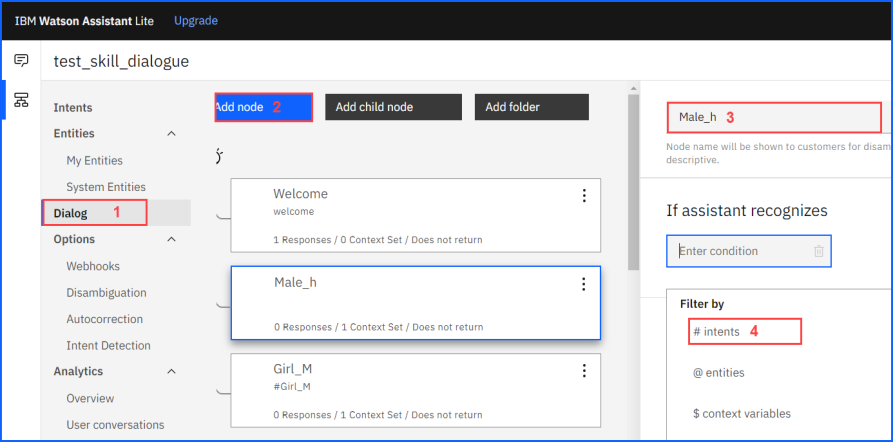
- From the Skills menu, click Dialog.
- Click Add Node
- Enter the node name (Node name should be the intent name you have created in step 5)
- Then choose the filter as intents and enter the node name in Enter Condition text box.
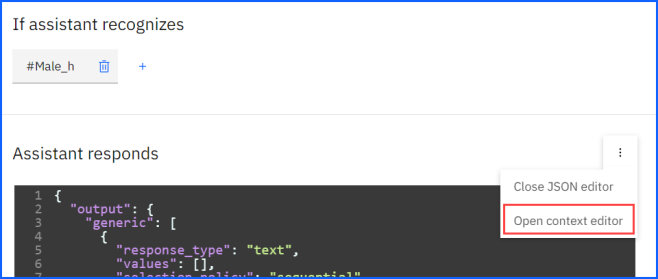
- In Assistant response, choose Open Context editor.
- Now enter the variable and value. For WhatsApp use the variable as $NLP to connect the Twixor WhatsApp Journey and IBM Watson. Enter the intent name in variable field.

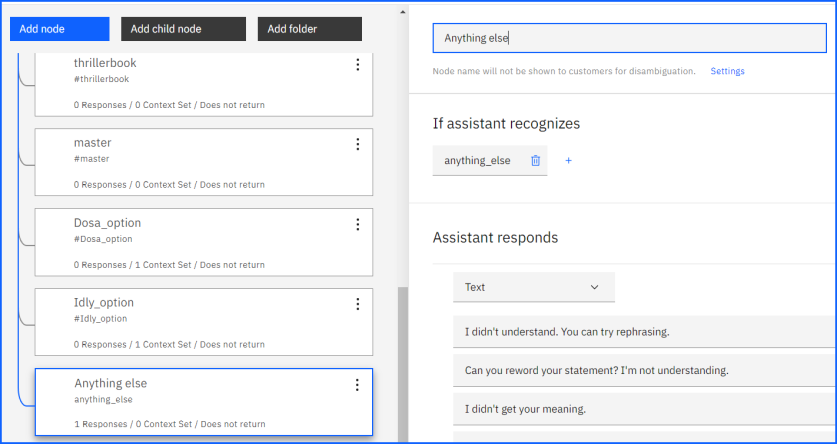
We can handle the exception using Anything else keyword from Watson when the decision node default value holds the AI node.
Add anything else node that contains phrases that are used to reply to users when their input is not recognized. You can replace the responses that are provided or add more responses with a similar meaning to add variety to the conversation. You can also choose whether you want your assistant to return each response that is defined in turn or return them in random order.
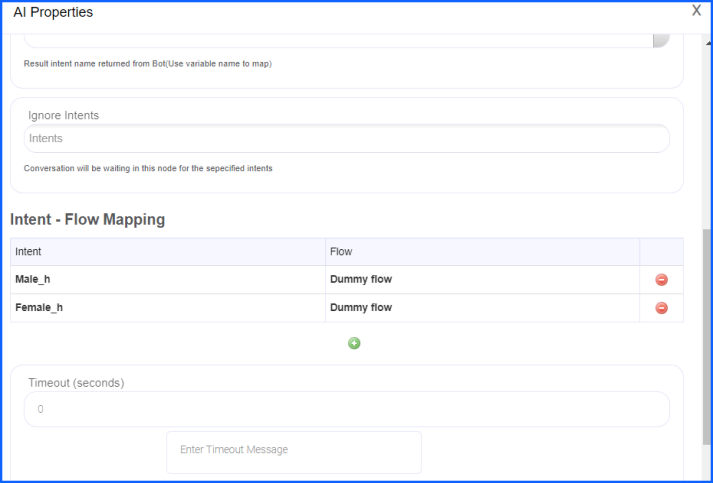
Step 8: Add the intent in AI node
Open the AI properties, add the intent which you created in IBM Watson and create a dummy flow in the corresponding journey and add in AI properties.
Info! Watson Assistant has classifier models that are designed specifically to support conversational skills in the following languages: Arabic, Chinese (Simplified), Dutch, English, French, German, Italian, Japanese, Korean, Portuguese, Russian, Spanish, Swedish.
Then add a decision node to map the intent to the corresponding field and end the flow.