Create Channel
This page explains the steps to create a channel through which your prospects can receive the EnCaps.
Navigation: Configuration->Channels
1. Channel page lists the channels that are already configured for your use.
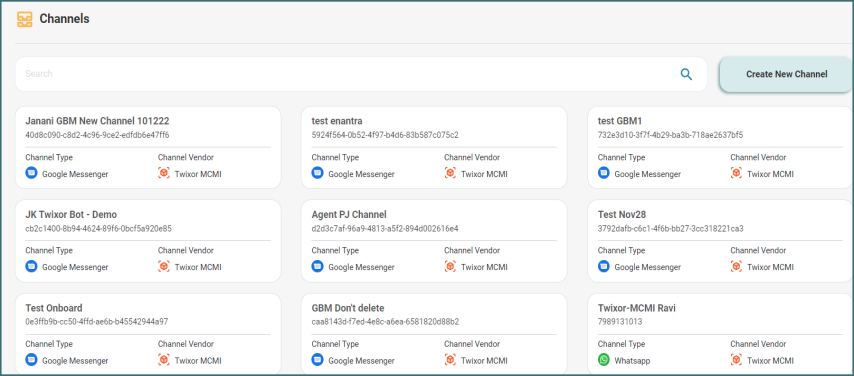
2. To create your own channel, click Create New Channel and enter the name of the channel in Name.
3. Select your desired type of channel (WhatsApp, Google Messenger, Telegram and Facebook Messenger) from Type.
To Create a WhatsApp Channel
In this page, you can create your own WhatsApp channels easily by a click of a button at a reduced cost.
1. To form a new WhatsApp channel, go to Channels page and click Create New Channel.
2. Give a unique name for the WhatsApp channel.
3. Select the type as WhatsApp to create a WhatsApp channel.
4. Select the WhatsApp vendor as Karix RCM.
5. Select the environment as Sandbox or Production.
- Click Sandbox to start the integration and testing right away without any special access.
- Select Production environment to avoid any sandbox restrictions. Contact Karix RCM support to move your application to production environment.
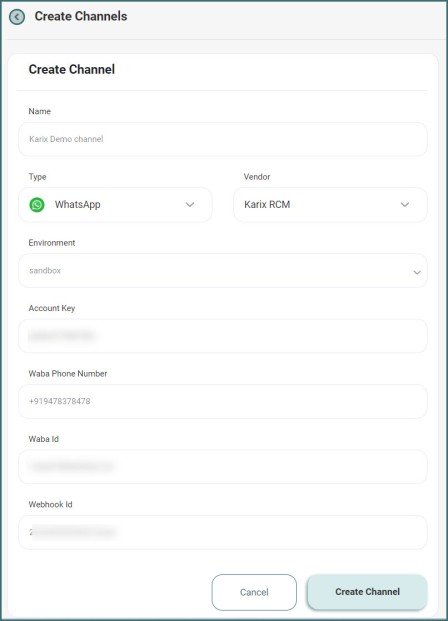
4. Enter the Account Key that can be obtained from the Karix RCM by contacting their support offline.
5. Enter the Waba number with country code and without any space. Example: +919847472431
6. Waba Id will be fetched by Karix team from their Facebook Portal.
Info! Account key, Waba Phone Number, Waba Id and Webhook Id will be provided by Karix RCM by contacting their support offline.
Using Webhook Id, you can able to view the delivery notification for the campaign (particular waba number) in twixor platform
7. Then click Create Channel to create a new WhatsApp channel.
8. You can use this channel to Publish a WhatsApp journey in Twixor.
To create a Telegram Channel
Telegram has evolved into one of the most popular and highly secured global messaging app with over 400 million users.
The Telegram integrated with Twixor allows you to employ this potential and reach out to your customers on their favourite channel.
Get started with the Telegram Channel by these steps:
- Navigate to Channels page.
- To create a new Telegram Channel, click Create New Channel button and enter the channel name in Name.
- Select the type of channel as Telegram.
- Select the vendor.
-
Enter the Hub account name or HTTP Auth login name.
Info! Contact your SAP/ Sinch Account Manager for login credentials
-
Type the basic authentication token and contact id.
-
Click Create Channel to create a new Telegram Channel. The channel will be created if the authentication credentials provided are valid.
Info! SAP365 vendor and Sinch is included in the current version of Twixor.
Sinch and SAP Social Channels 365 mobile service supports many social channels including Telegram to allow customers to connect globally.
To create a Facebook Channel
To create a Facebook messenger channel, click this link https://www.facebook.com/profile.php and sign in with your Facebook Account.
Please open the below link to view “Getting Started” docs
https://developers.facebook.com/docs/messenger-platform/getting-started
Follow the below steps to register and create your FBM account,
1. Create a Facebook Page
2. Create a Facebook App
3. Link your page and app
Create a Facebook Page
1. Go to https://www.facebook.com/pages/?category=your_pages&ref=bookmarks and create your facebook page for your business.
2. Click + Create New Page and add the name, category for your page then click Create.
Note: Created page will be listed in Pages -> Your pages
Create a Facebook Application
Before creating a facebook application, first you need to be logged in your facebook developer account.
1. To register as a facebook developer account, click https://developers.facebook.com/async/registration/
2. After completing your registration, you will be directed to the apps page.
3. Click Create App and select an application type.
4. Enter your application name and click Create app.
5. Once the application was created, go to https://developers.facebook.com/apps/ and select your created application.
Link your page and app
1. In Left Navigation bar, under Products go to messenger -> settings
2. In Access Tokens Section, click Add or remove Pages.
3. Continue with your facebook User Account credentials and select your page to link the created page and application.
4. Click Generate token to view the page short token. Share the page short token with twixor team.

5. Under Webhooks Section, enter the call back URL and Verify Token (this will be provided by twixor dev team) to receive Webhook Events. Click Verify and save.
6. Again, click Add or Remove Pages, under Webhooks Section, verify your Facebook User Account credentials and Select your Page.
7. Click Edit on the right side of the selected page row.
8. A dialog box with available webhook events will open.
Select the following checkbox items.
a. messages
b. message_deliveries
c. message_reads
d. messaging_postbacks
and Click Save.
Generate Long Term Token
To Generate Long Term Page Access token, please follow below steps and share to Twixor Dev Team,
1. Log into Facebook User Account.
2. Click the below link to get to Graph Explorer Page where you can follow further process.
https://developers.facebook.com/tools/explorer/
3. In the right-side panel, Select Your App under "Facebook App" drop down if not already selected.
4. Select “Page Access Tokens” in the User or Page dropdown.
5. Check if the set of permissions listed below is right.
6. Click info icon in blue color under Access Token text field.
7. Token details will be displayed under Access Token Info window. Click “Open in Access Token Tool” button.
8. A “Access Token Debugger” browser tab will open.
9. Verify the token details once and Click “Extend Access Token”. And if the page requests for Facebook Account Password, provide the same.
10. A token with “This new long-lived access token will never expire:” header message will appear in green font color.
11. Copy that token string to your secure place and share it to respective technical member for integration.
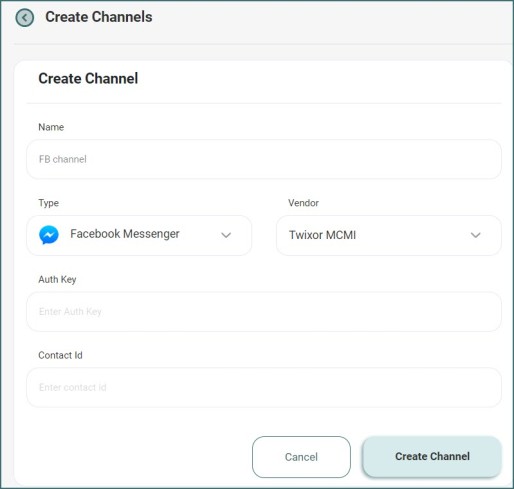
To create a Facebook channel, navigate to Channels page and click Create New Channel.
Give a channel and choose the type as " Facebook".
Info! Auth Key and Contact id will be provided by the Twixor Dev Team.
To create and configure a Google Messenger Channel
Before creating a Google Business Messages (GBM) channel in twixor, you need to create a GBM account by clicking the following link: https://developers.google.com/business-communications/business-messages and sign in with your Google Account.
Follow the below steps to register and create your GBM account,
1. Register as a partner
2. Create a Service account
3. Create and Configure Agents
Register as a partner
1. Go to Developer docs page, and click Register as a partner (https://developers.google.com/business-communications/business-messages/guides/how-to/register)
2. Create Partner Account which allows you to create Business Messages Brands and Agents. Follow the steps mentioned in the link to Register as a Partner, creating a Service Account and Setting up your webhook.
3. Open the Business Communication Developer Console.
4. Under Business Messages, click Create partner account and add your name, partner name, partner website and region, then click Create. Then, the success message – “Partner Created” will be displayed.
Create a Service account
1. After creating a partner account, click Partner Account Settings and go to “Service Account” page.
2. Click Create Key and create your private key.
3. After creating service account your browser downloads the service account key as a JSON file and the content of JSON file will be added in GBM channel creation page.
After registering as a Business Messages partner, you can have access to the Business Messages and Business Communications APIs. The Business Messages API sends messages to users, while the Business Communications API manages agents.
Create agents
1. Go Back to Business Communications or open this link on How to create an agent
2. Click Create agent.
3. Enter values for Brand name and Agent name.
Note: If the “Enable Business Messages Helper Bot” button is ON by default, then disable the toggle button while creating an agent.
4. Click Create agent.
5. After creating the agent, click on the created agent to view the Agent ID and Brand ID under agent information in “Overview” page.
6. Login to the twixor application and the Agent ID, Brand ID and Service Account Details (JSON file) are required for TWIXOR MCMI Channel creation. And then GBM channel will be configured.
Get started with the below steps to create a Google Messenger channel for Twixor MCMI by configuring and setting up the business details.
1. Navigate to Channels page.
2. To create a new Google Messenger Channel, click Create New Channel button and enter the channel name in Name.
3. Select the type of channel as Google Messenger.
4. Select the vendor as Twixor MCMI.
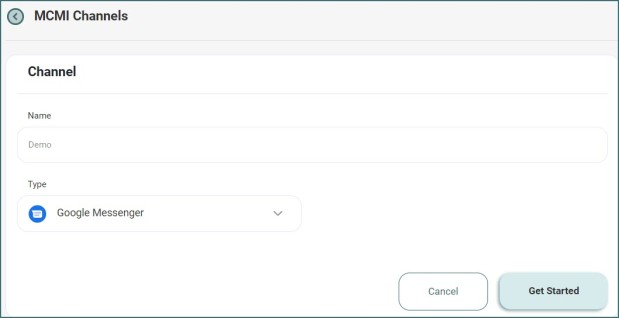
5. Before choosing the MCMI channel name from the drop-down, you need to create a Twixor MCMI channel by navigate to Channels page -> MCMI Channels and click Create New channel.
6. Give the channel name and choose the type as Google Messenger and click Get Started.
Creating MCMI Channel
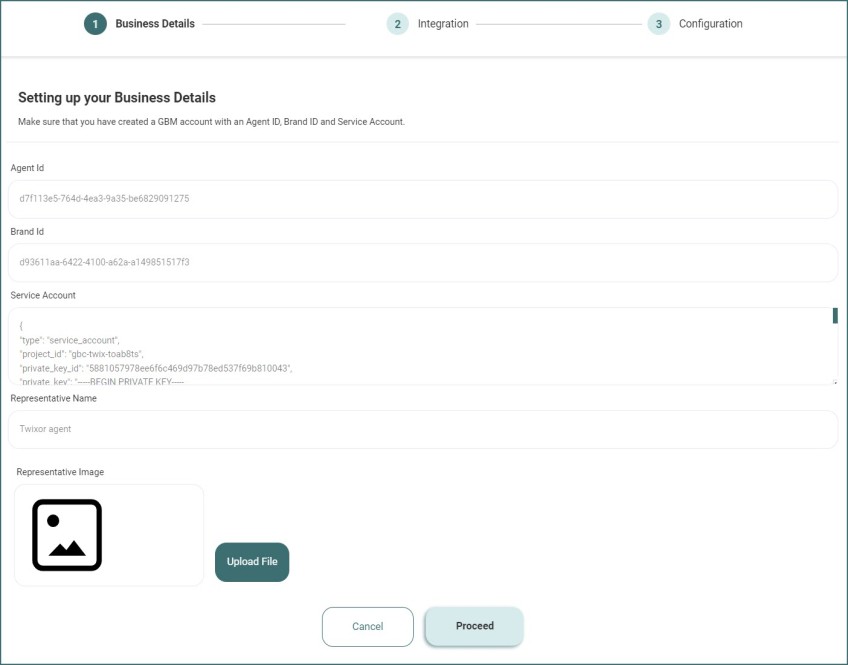
Setting up your Business Details
Under Business Details, give the MCMI channel name, agent id, brand id, service account (json file) and add the representative name and logo (if required) in the respective text fields.
"Channel Name" – the unique name of MCMI Channel
"Agent ID" - the Agent ID is a string provided by Google Console while setting up the agent. It can be found on the Agent overview page.
"Brand ID" - the Brand ID is a string provided by Google Console while setting up the agent. It can be found on the Agent overview page.
"Service Account" - Your browser downloads the service account key to securely authenticate API calls to the Business Messages and Business Communications APIs
"Representative Name and logo" - the Representative Name is the name that represents bot. This is an optional field for MCMI channel setup.
By clicking on the Proceed button, success message thrown as “Channel has been partially created”
Then, the user can proceed with the input of Integration details for channel setup.
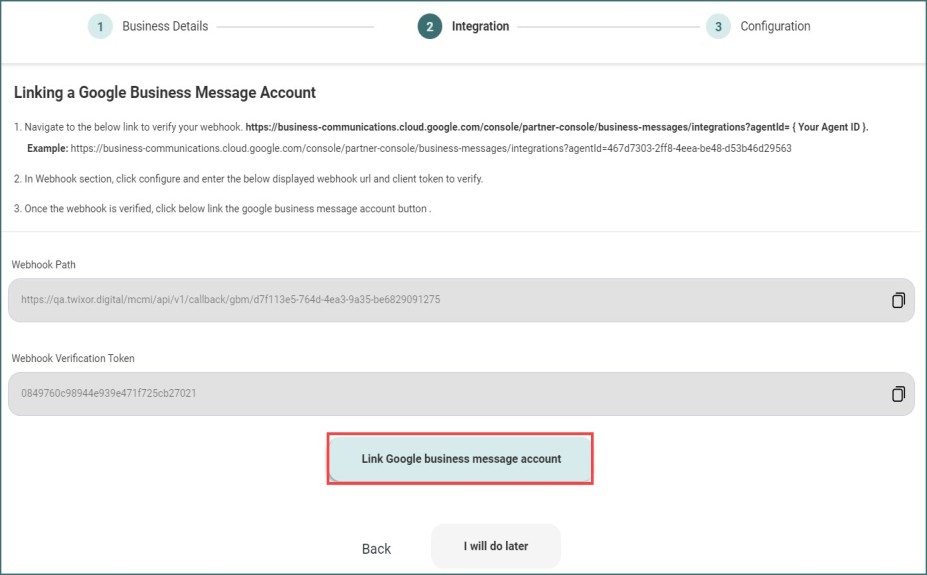
Linking a Google Business Message Account
While on the Integration Details page, client token and webhook path will be displayed.
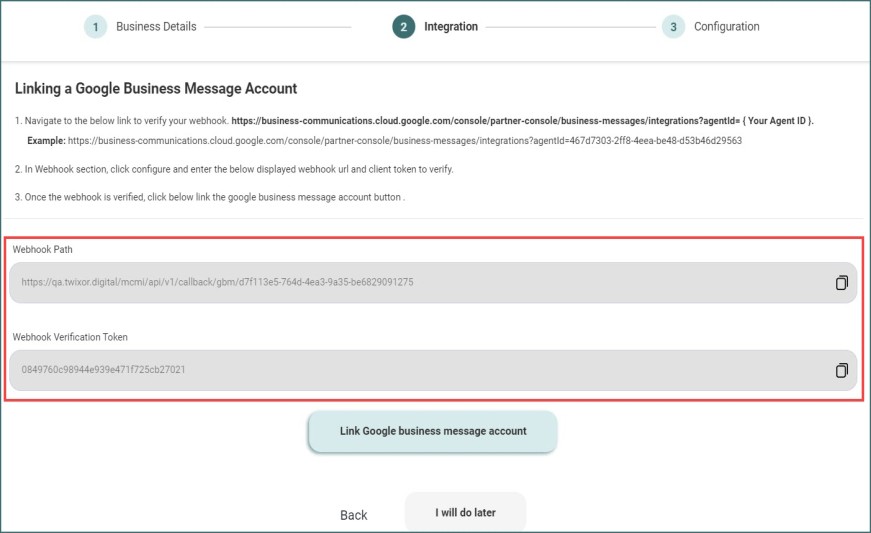
You need to manually verify your Webhook URL and Client Token into Google console.
Example:
https://business-communications.cloud.google.com/console/partner-console/business-messages/integrations?agentId=467d7303-2ff8-4eea-be48-d53b46d29563
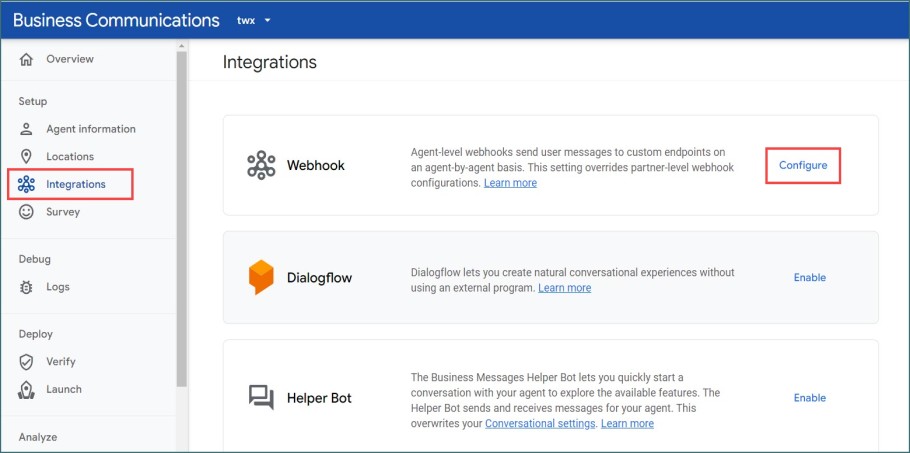
Click Partner Account Settings and navigate Integrations page.
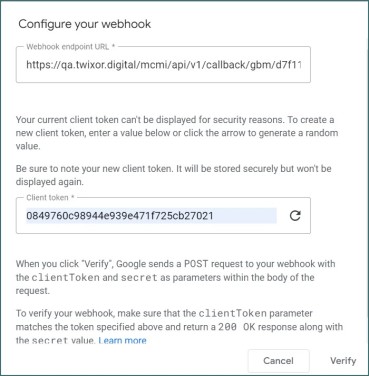
Click Configure and enter Webhook URL and Client Token in “Configure your Webhook” screen. By clicking on the Verify button, the GBM channel configuration will be set up.
Once the webhook is verified, click on “Link Google business message account” in the integration page to proceed to the next step.
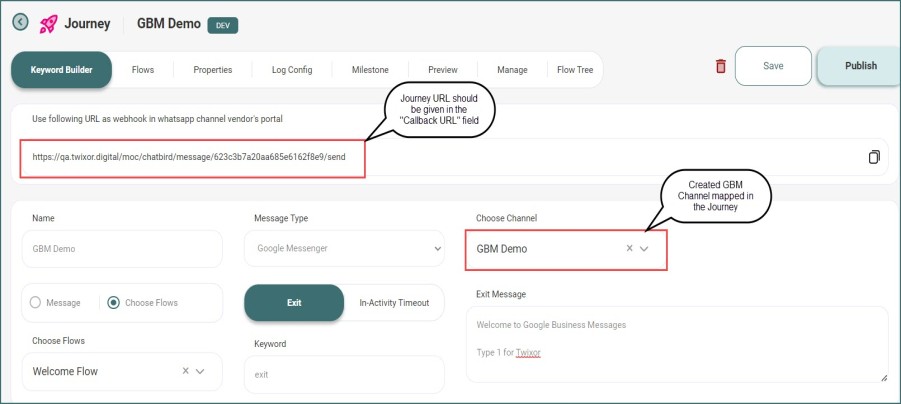
Configure your Google business message account
Under configuration, enter the webhook URL (found under the keyword builder page of the respective journey for which we are in the process of creating the MCMI channel) in the "Callback Url" field and click Get Started button.

Once the MCMI channel is created, the channel name will be listed under the drop-down of the “Choose MCMI Channel” of the create channel page for the user to choose. Auth key and Contact Id will be displayed in the respective text fields.
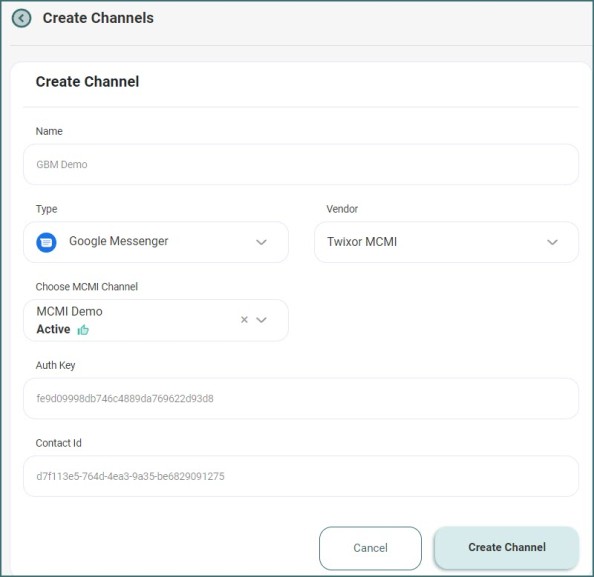
Then, click Create Channel button to create a Google Messenger Channel.
Editing MCMI Channel
You can edit any fields in the Business details and configuration page to save the changes by navigating to the corresponding MCMI channel and click Re-Configure GBM Account button.
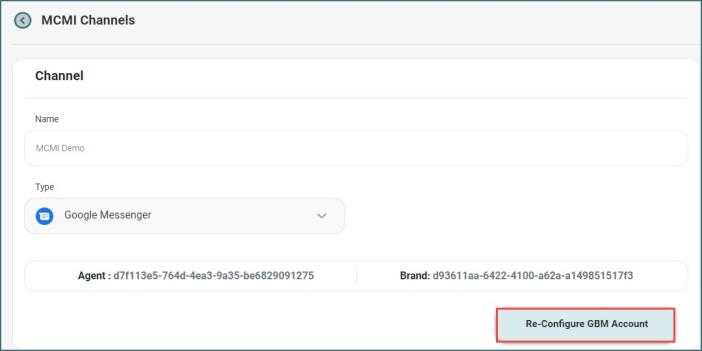
For editing the Agent Id, you need to verify the client token and webhook path once again to link your google business message account in Google Console page.